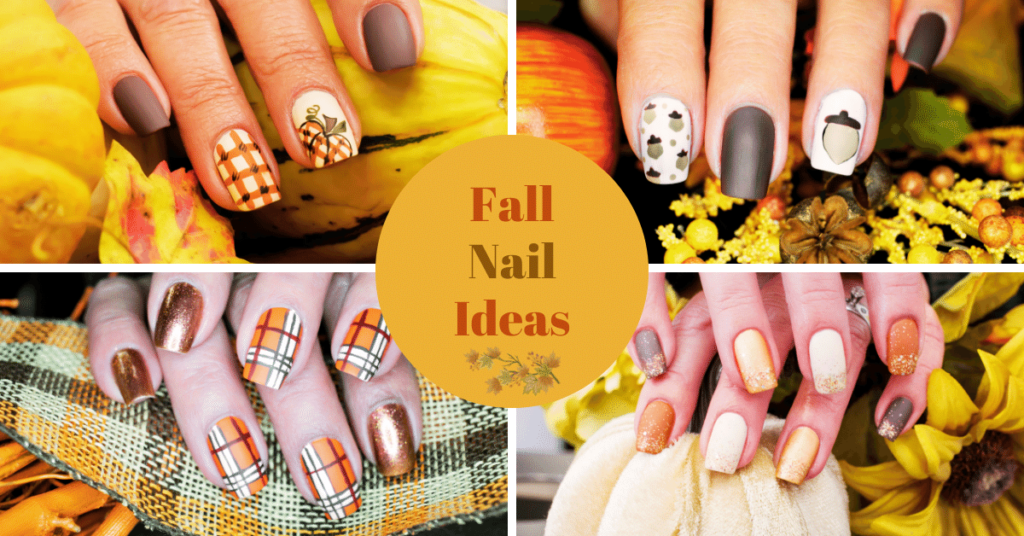
Ready for the best autumn nail art? Dive in! Discover fall nail designs, tutorials, and expert tips for cozy, trendy manicures.
Fall is a fun season filled with warm colors, cozy sweaters, and pumpkin spice everything. What better way to embrace this colorful time of year than by adorning your nails with captivating fall nail art? Whether you’re a seasoned nail artist or just starting, there’s a fall-inspired design for everyone.
In this article, we’ll dive into everything you need to know to create stunning DIY manicures that capture the essence of autumn. We’ve covered you, from gathering your supplies to maintenance and removal tips. So, let’s get started!
Table of Contents
Gathering Your Supplies
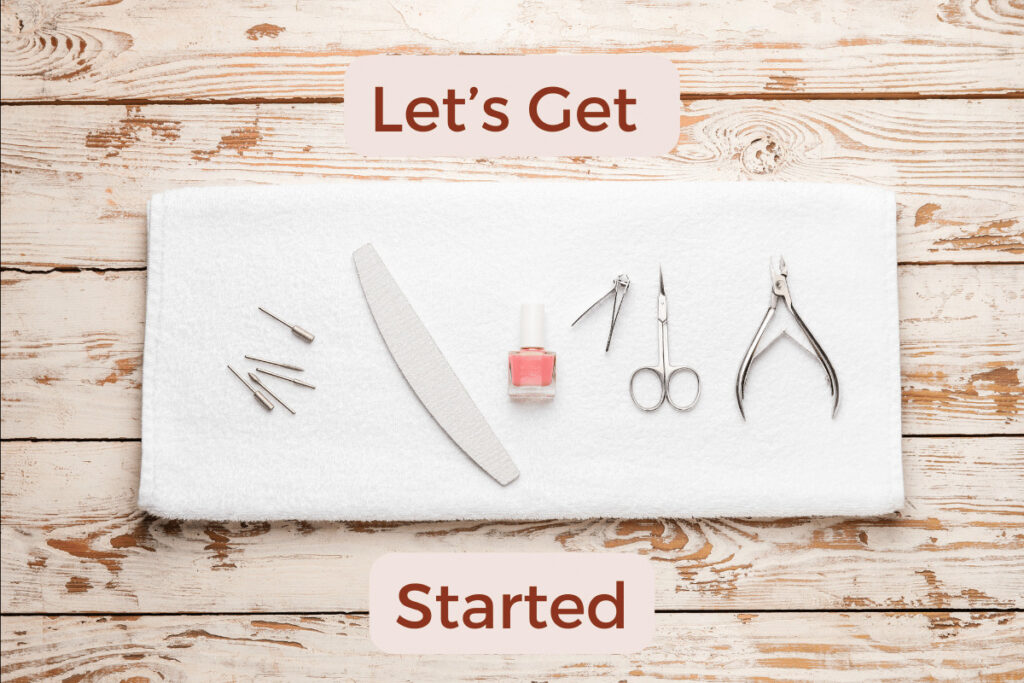
Gathering the right supplies is essential before jumping into the creative world of fall nails. Here’s a checklist to ensure you have everything you need:
- Nail polish in fall-inspired colors: Deep reds, oranges, earthy browns, deep greens, and metallic shades are perfect for this season.
- Base coat and top coat: These are your manicure’s best friends. They provide protection and ensure longevity.
- Nail art brushes or toothpicks: These are used for intricate designs and details.
- Nail polish remover: Essential for cleaning up mistakes.
- Nail file and buffer: Achieve the perfect nail shape and smooth surface.
- Nail stickers or stencils (optional): These tools provide a user-friendly design experience, perfect for beginners.
Now that you’re equipped, let’s move on to nail preparation.
Prepping Your Nails
Preparation is the key to a long-lasting and flawless manicure. Follow these steps to get your nails ready for the fall artistry:
Step 1: Removing Old Nail Polish
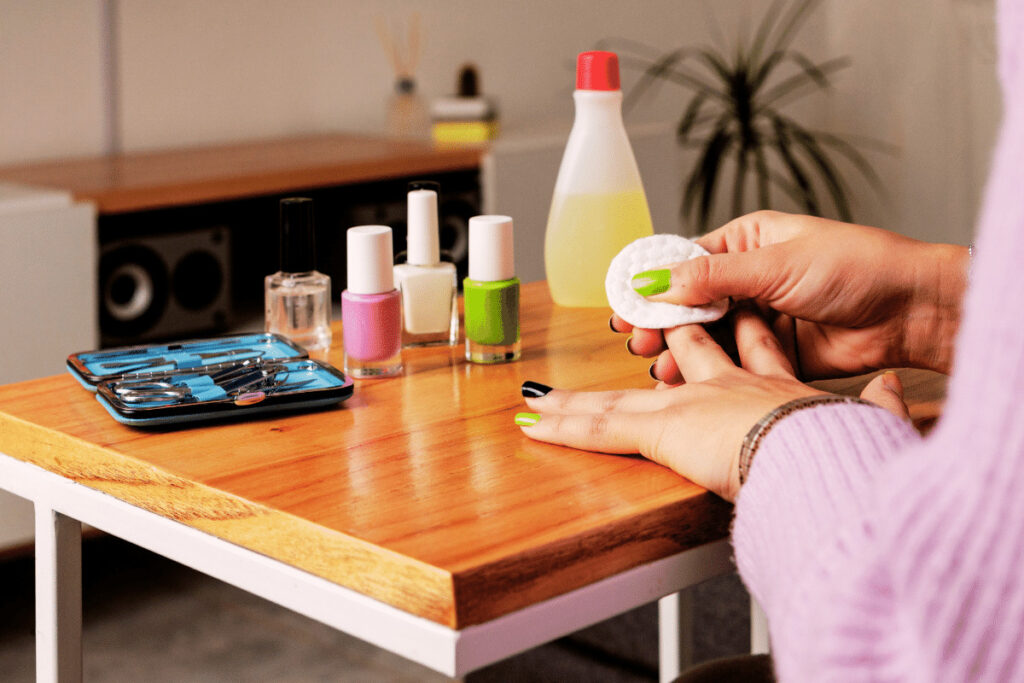
- Begin by removing any existing nail polish using a gentle nail polish remover.
- Opt for an acetone-free remover to prevent excessive drying of your nails.
Step 2: Shaping and Filing Nails
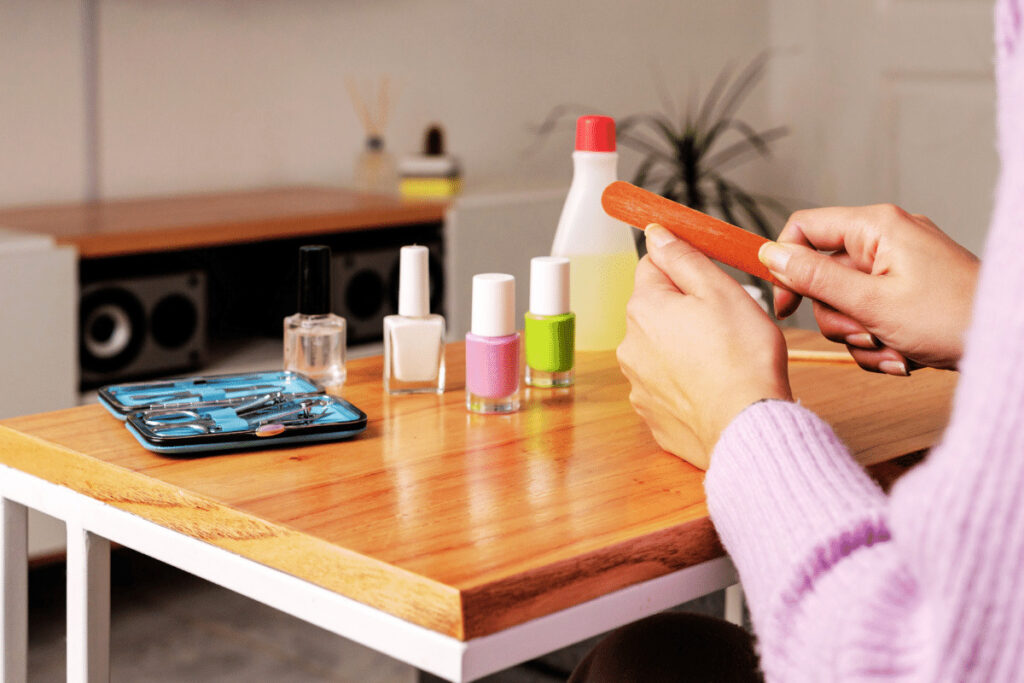
- Shape your nails according to your preference. For fall nails, almond or square shapes work well. But your nails also represent your creativity, so go with the nail shape that fits your taste best.
- Next, use a nail file to smooth rough edges and create a neat canvas for your designs.
- A soft buffer can be used to make the nail surface even smoother.
Step 3: Applying a Base Coat
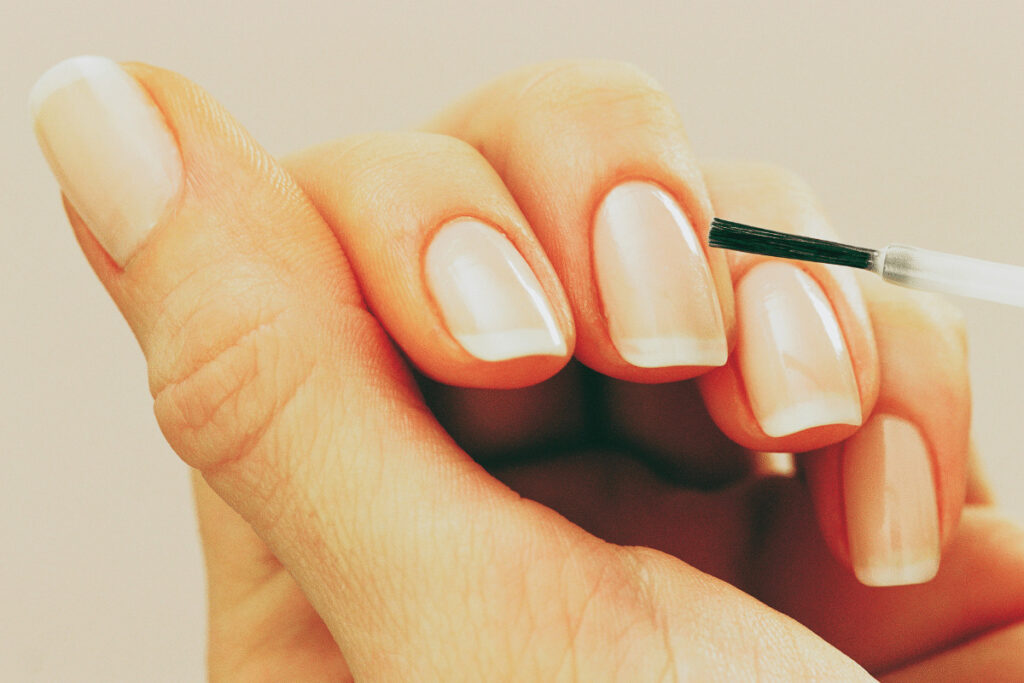
- When using the base coat, apply a thin layer to each nail.
- This step is crucial as it creates a protective layer between your natural nails and the colored polish, preventing staining and chipping.
- When completed, allow the base coat to dry completely before moving on to your chosen fall nail art design.
Fall Nail Art Inspiration
Now that your nails are prepped, it’s time to explore the exciting world of fall nail art. Here are ten stunning ideas to inspire your creativity:
Warm Ombre Nails with Gradient Shades of Brown and Orange
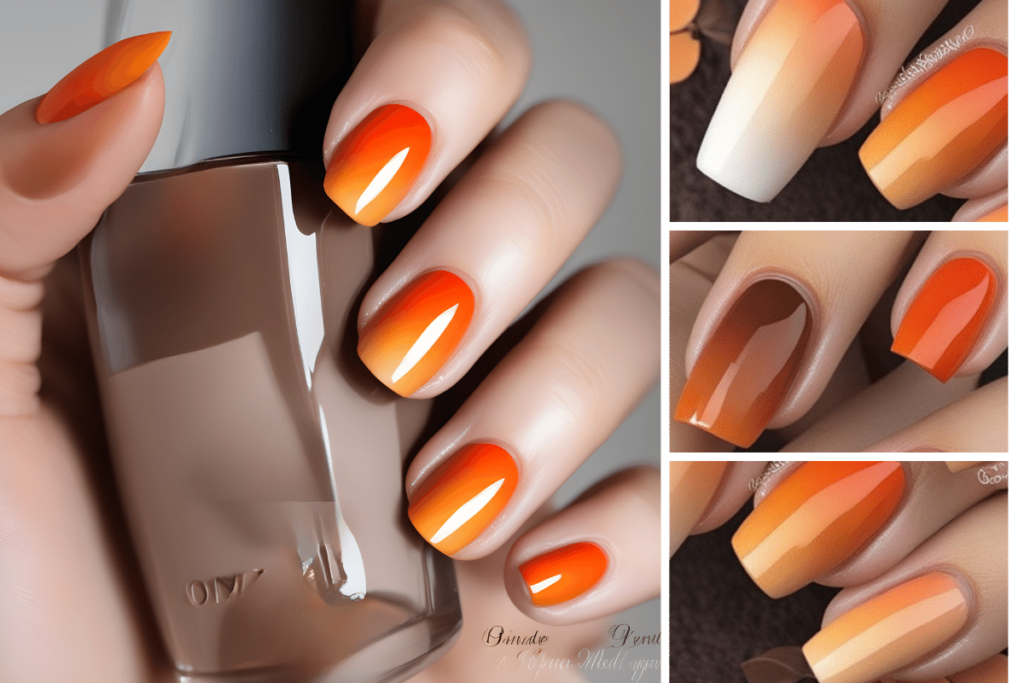
- Capture the warm and earthy tones of autumn with a mesmerizing ombre effect. Blend deep browns and vibrant oranges to create a gradient masterpiece.
- To achieve this look, you’ll need nail polish in shades of brown and orange and a makeup sponge for blending.
- Start by applying your chosen base coat color—once dry, dab small amounts of your selected brown and orange shades onto a makeup sponge.
- Gently press the sponge onto your nails, moving it back and forth to create the ombre effect. You will want to repeat this step until you achieve the desired intensity.
- You can clean up excess polish around your nails with a small brush or Q-tip dipped in nail polish remover.
- Finish with a clear top coat to seal the colors and add a glossy finish.
Leaf and Pumpkin Designs
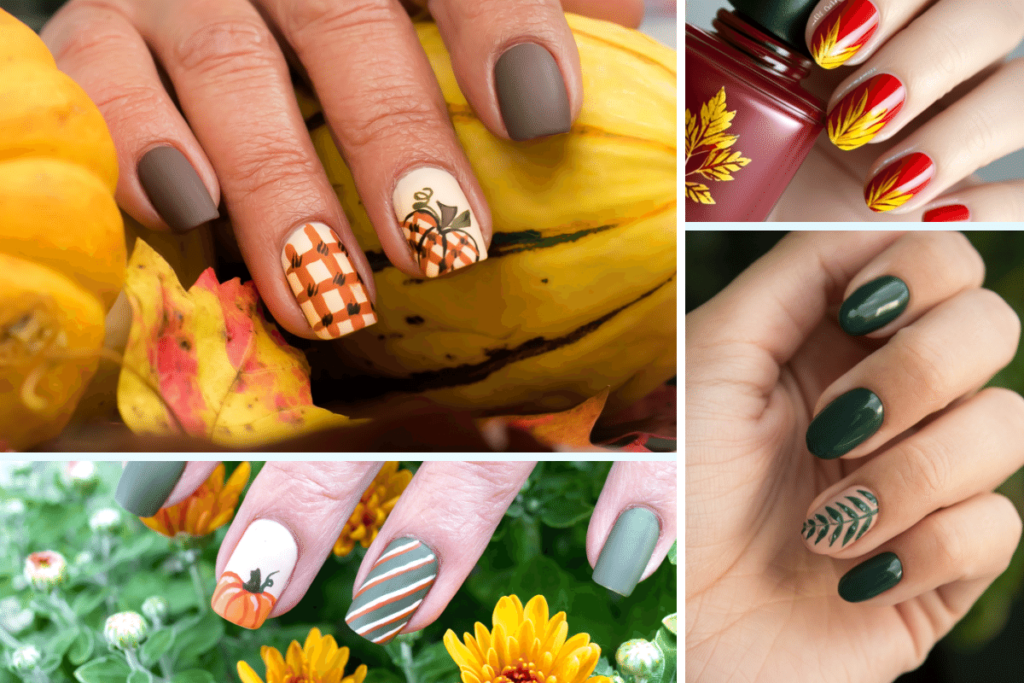
- Celebrate fall foliage and harvest season with intricate leaf and pumpkin nail art.
- Use rich, autumnal colors like deep red, burgundy, and gold to paint leaves with delicate veins. Create cute and realistic pumpkins with textured surfaces using nail art brushes.
- To create leaf designs:
- Start with a clean, dry base coat.
- Apply your chosen base color, preferably a deep red or burgundy, and let it dry completely.
- Using a fine nail art brush, paint the shape of a leaf on each nail.
- Add intricate veins to the leaves using contrasting colors like gold or dark green.
- Finish with a clear top coat to protect your artistry.
- To create pumpkin designs:
- Apply a rich orange nail polish as the base color and allow it to dry.
- Use a nail art brush to create small brown ovals for pumpkins on each nail.
- Add green stems and delicate curved lines for a pumpkin effect.
- Finish with a clear top coat to protect your design and add shine.
Plaid or Flannel Patterned Nails
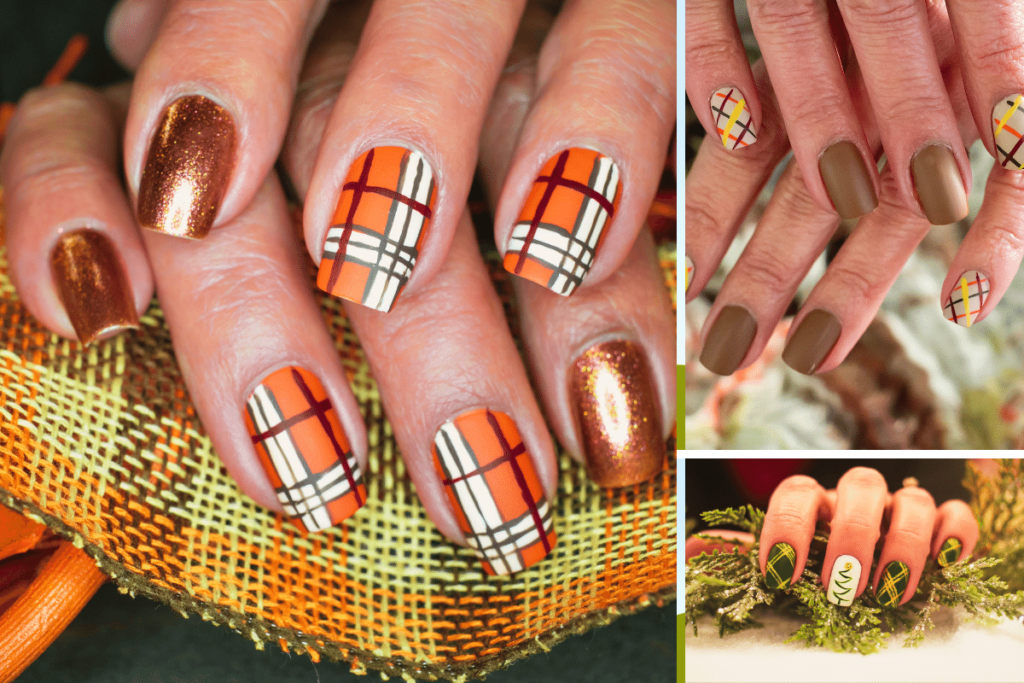
- Embrace the cozy vibes of flannel shirts with plaid patterned nails.
- Achieve precision with your lines and squares using nail art brushes. Explore classic plaid color combinations to complete the look.
- To create plaid or flannel patterns:
- Start with a clean, dry base coat.
- Apply your chosen base color, typically a neutral shade like beige or light gray, and let it dry completely.
- Use a nail art brush or a thin nail polish brush to create vertical and horizontal lines in your desired plaid pattern.
- Add squares by connecting the lines, alternating colors as needed.
- Finish with a clear top coat to protect your design and add a glossy finish.
Metallic Accents for a Touch of Glam
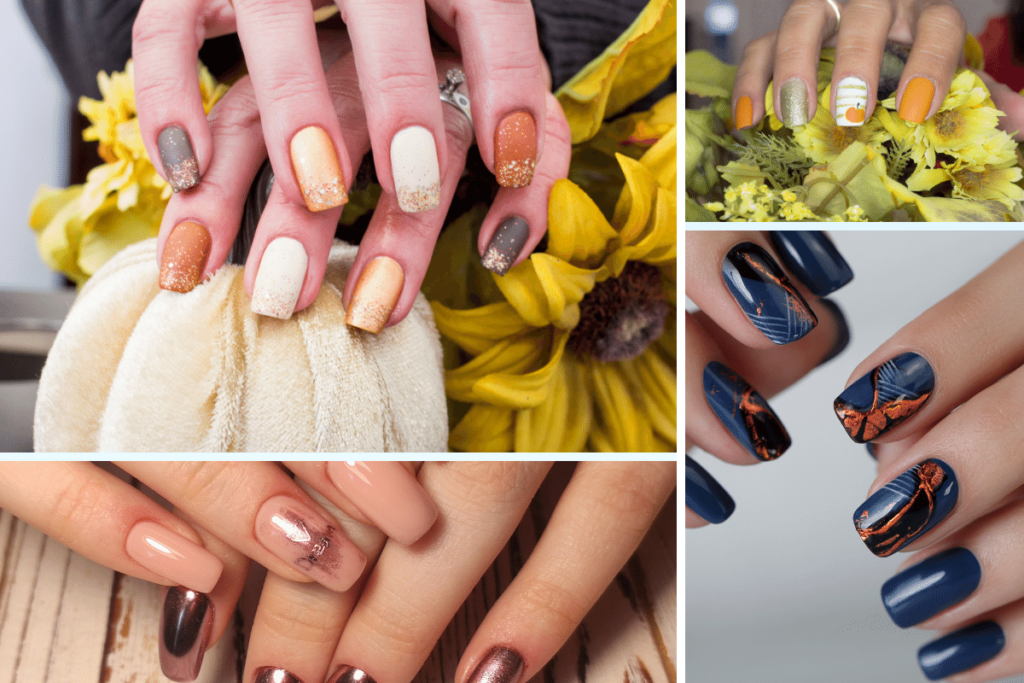
- Elevate your fall nail art with metallic accents. Add a touch of glamour to your cozy manicure.
- Experiment with foil, studs, or chrome to create striking, eye-catching designs.
- To add metallic accents:
- Start with a clean, dry base coat.
- Apply your chosen base color and let it dry.
- Use nail adhesive or a clear top coat to create the desired pattern for your metallic accents.
- Carefully place the metallic elements onto your nails while the adhesive is still tacky.
- Allow the metallic accents to set, then seal the design with a clear top coat for added protection and shine.
Harvest Moon Nails
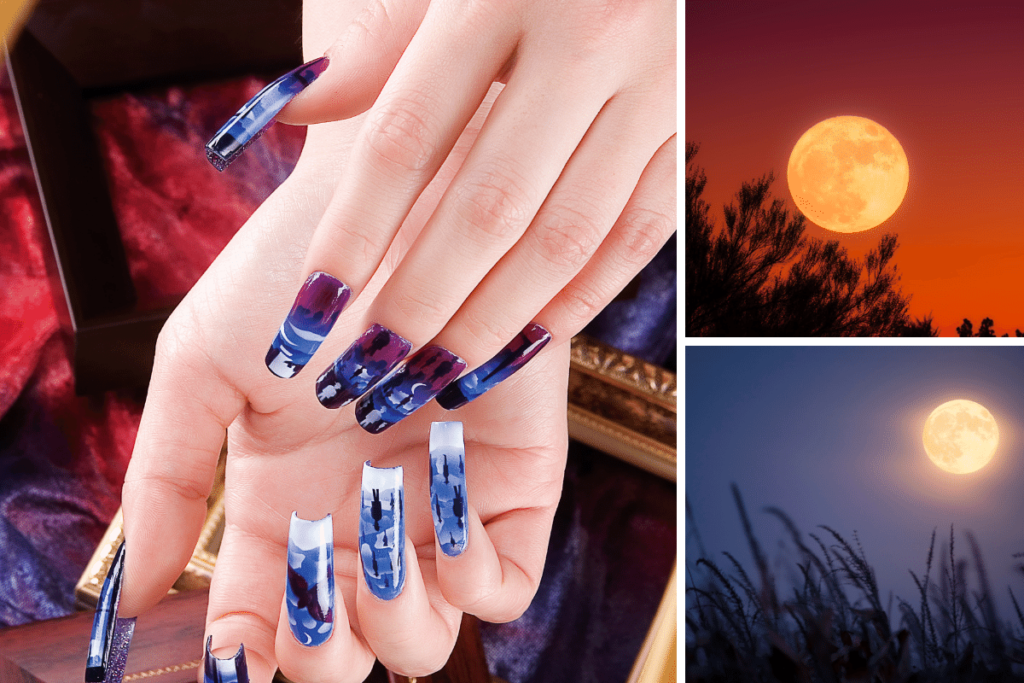
- Paint a serene moonlit sky complete with autumn leaves and a peaceful moon.
- Choose nail polish colors like midnight blue, silver, and shades of orange to capture the essence of a harvest moonlit night.
- To create harvest moon nails:
- Begin with a clean, dry base coat.
- Apply a deep midnight blue nail polish as your base color.
- Using a fine nail art brush, paint a serene moon on one or more nails.
- Add tiny leaves or branches in red, orange, and yellow shades to create a whimsical autumn scene.
- Finish with a clear top coat to protect your masterpiece and enhance its longevity.
Sweater Weather Nails
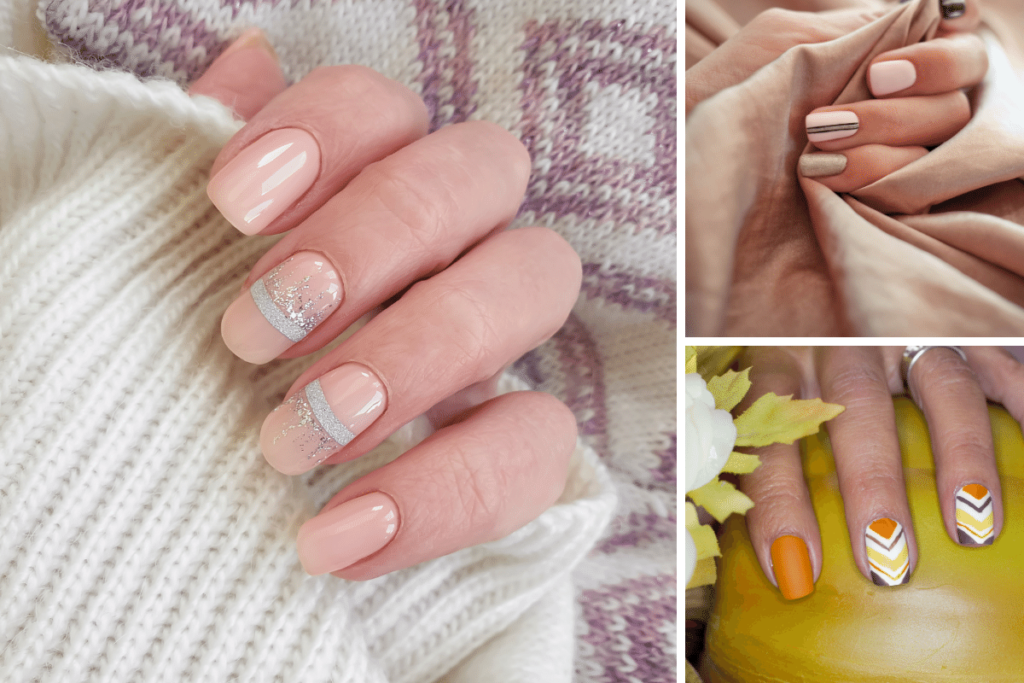
- Cozy up your nails with intricate sweater patterns like cable-knit or Fair Isle.
- Use nail art brushes and soft gray, cream, and metallic gold nail polish to achieve the perfect knit-like designs.
- To create cable-knit or Fair Isle patterns:
- Begin with a clean, dry base coat.
- Apply your chosen base color, typically a neutral shade like cream or light gray.
- Use a nail art brush to paint intricate cable-knit or Fair Isle patterns on each nail.
- Experiment with different designs, from braided cables to geometric patterns.
- Finish with a clear top coat and add a polished finish to protect your design.
Haunted Halloween Nails
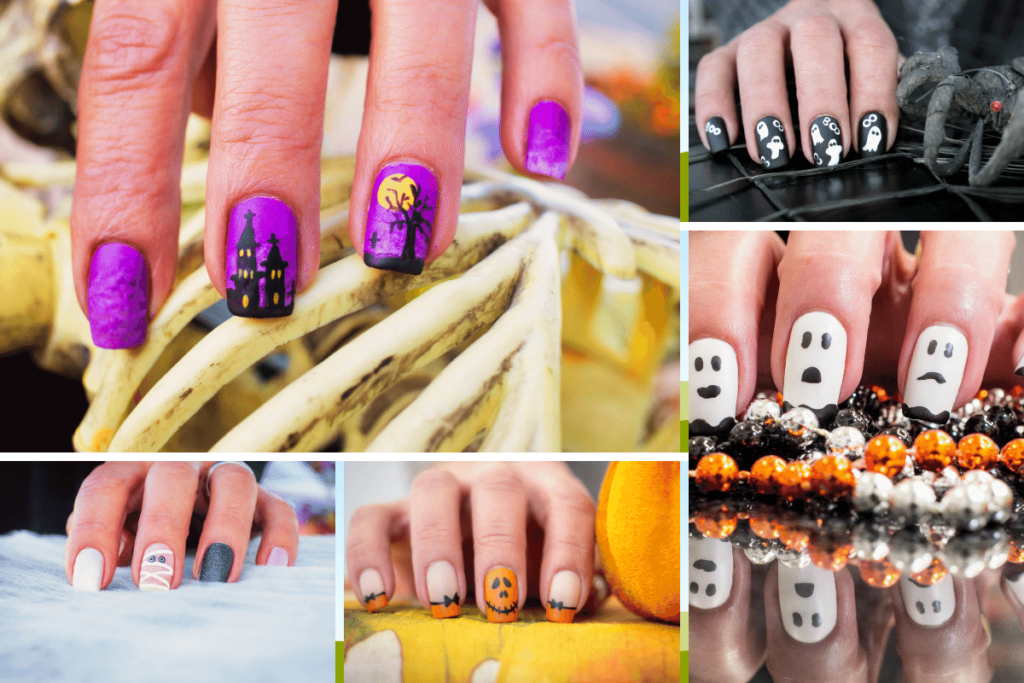
- Get into the spooky spirit with Halloween-themed nail art.
- Paint bats, ghosts, spider webs, and more using vibrant colors like black, purple, and neon green.
- To create Halloween-themed nail art:
- Begin with a clean, dry base coat.
- Apply a dark color, such as black or deep purple, as your base color.
- Use a nail art brush or fine-tipped nail polish brush to paint spooky designs on each nail.
- Experiment with different Halloween motifs, including bats, ghosts, spider webs, and even haunted houses.
- Add pops of vibrant colors like neon green or orange for a playful touch.
- Finish with a clear top coat to protect your spooky designs.
Falling Rain Nail Art
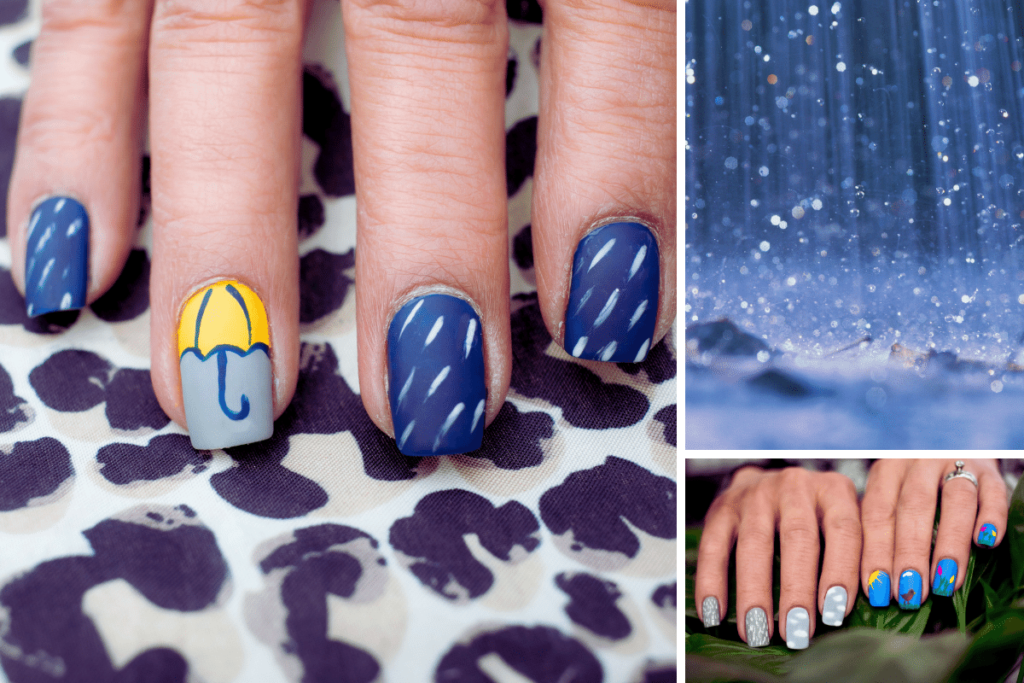
- Depict a rainy fall day on your nails with raindrops and umbrella designs.
- Use shades of gray and blue to create a realistic rain effect, and add a touch of whimsy with umbrella motifs.
- To create rainy-day nail art:
- Begin with a clean, dry base coat.
- Apply a soft gray or light blue nail polish as your base color to represent the cloudy sky.
- Use a fine nail art brush or toothpick to paint raindrop designs falling from the top of your nails.
- Add colorful umbrella motifs to some nails to create a playful contrast.
- Finish with a clear top coat to protect your rainy-day masterpiece.
Fall Foliage Gradient
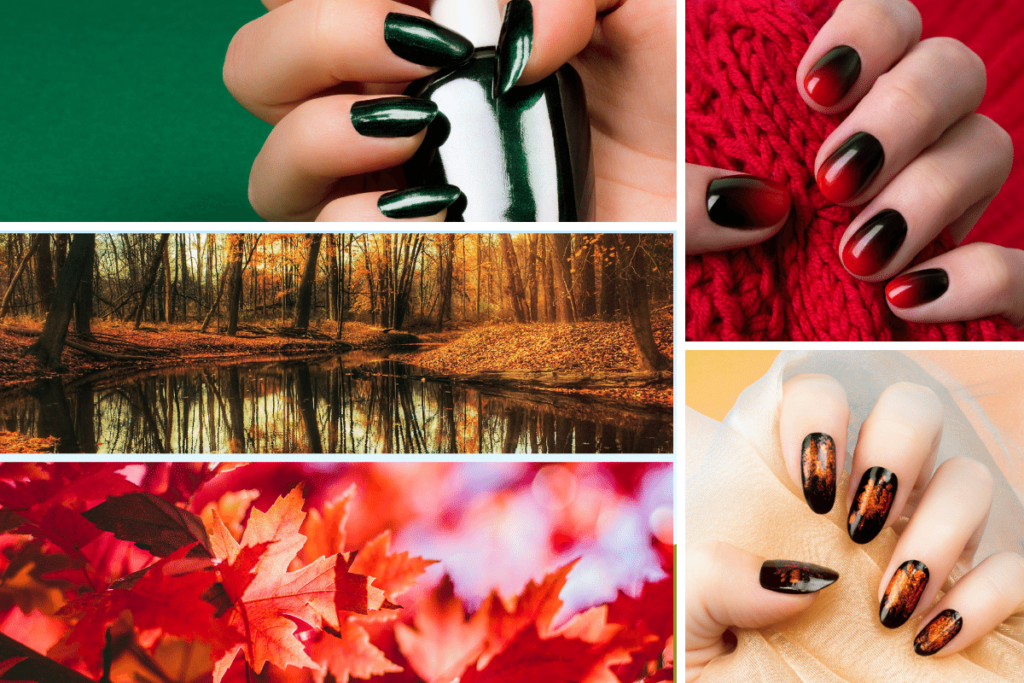
- Mimic the transition of leaves from green to various autumn hues with a gradient nail art design.
- Choose colors like deep red, burnt orange, and golden yellow to capture the beauty of fall foliage.
- To create a fall foliage gradient:
- Start with a clean, dry base coat.
- Apply your chosen base color, like a deep green or forest green, as your starting point.
- Use a makeup sponge to dab and blend shades of deep red, burnt orange, and golden yellow onto your nails, creating a gradient effect.
- Apply multiple layers if necessary to achieve the desired intensity of colors.
- Finish with a clear top coat to seal your gradient design and add shine.
Apple Orchard Nails
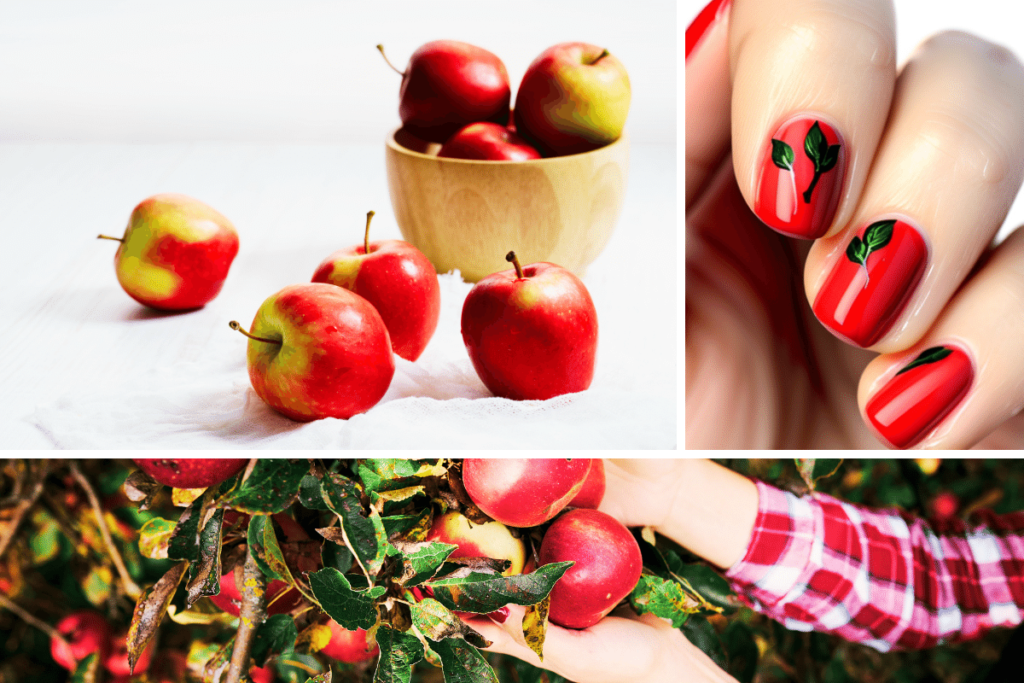
- Capture the essence of the apple-picking season with adorable apple-themed nail art.
- Paint glossy apples with stems and leaves using red, green, and brown nail polish.
- To create apple-themed nail art:
- Begin with a clean, dry base coat.
- Apply a fresh red nail polish as your base color to represent ripe apples.
- Use a fine nail art brush or toothpick to paint apple shapes on each nail.
- Add brown stems and vibrant green leaves for a realistic touch.
- Finish with a clear top coat to protect your glossy apple designs.
Step-by-Step Tutorials
Ready to turn these inspirations into reality? Let’s dive into step-by-step tutorials for three captivating fall nail art designs:
Tutorial 1: Autumn Leaves
- Begin with a clean, dry base coat.
- Apply a deep green nail polish as the base color. Allow it to dry completely.
- Using a fine nail art brush, paint the shape of a leaf on each nail using burgundy or dark red nail polish.
- Add intricate veins to the leaves using contrasting colors like gold or dark green.
- Finish with a clear top coat to protect your artistry and add a glossy finish.
Tutorial 2: Pumpkin Spice Nails
- Apply a rich orange nail polish as the base color and allow it to dry.
- Use a nail art brush to create small brown ovals for pumpkins on each nail.
- Add green stems and delicate curved lines for a pumpkin effect.
- Finish with a clear top coat to protect your design and add shine.
Tutorial 3: Cozy Sweater Nails
- Start with a neutral gray base coat and let it dry.
- Use a nail art brush to paint intricate cable-knit or Fair Isle sweater patterns on each nail using cream or metallic gold nail polish.
- Experiment with different designs, from braided cables to geometric patterns.
- Finish with a clear top coat and add a polished finish to protect your design.
With these detailed tutorials, you can bring the beauty of fall to your fingertips. Feel free to mix and match designs to create a unique and personalized fall manicure.
Pro Tips for Nail Art Success
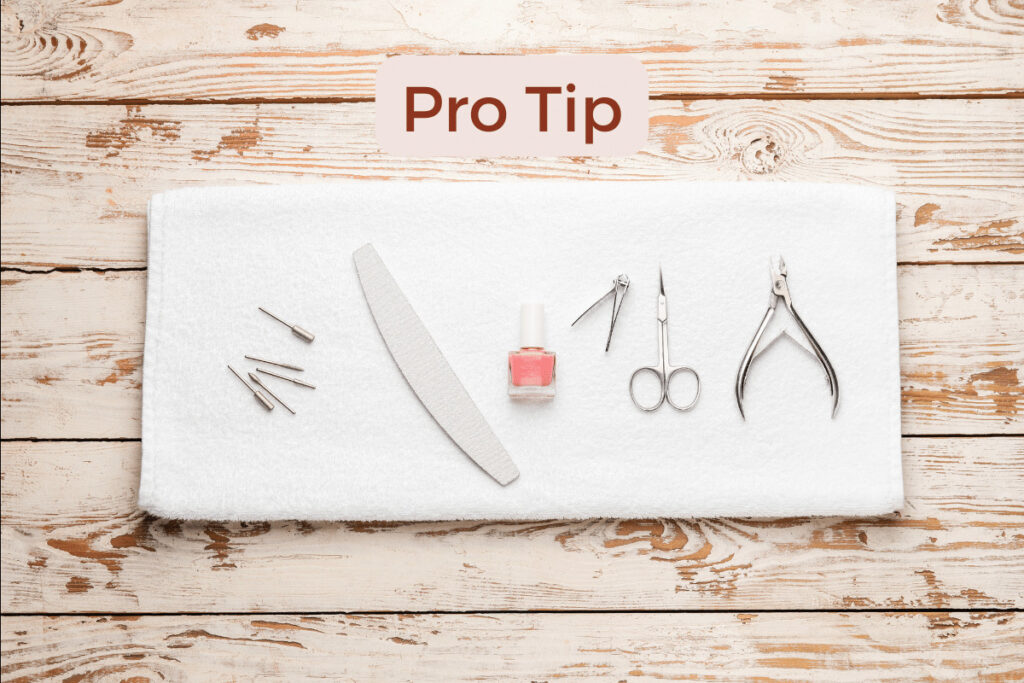
Achieving a professional-looking manicure at home requires a few tips and tricks:
- Fixing Mistakes: If you make a mistake, dip a fine brush in nail polish remover to correct it.
- Precision: For intricate details, use toothpicks or specialized nail art brushes.
- Sealing the Deal: Always finish with a clear top coat. This is to protect your design and add shine.
Maintenance and Removal
To ensure your fall nail art lasts, follow these maintenance and removal tips:
- Maintenance: Apply a fresh layer of top coat every few days to prevent chipping.
- Removal: Use an acetone-free nail polish remover to protect your nails. Soak a cotton ball, hold it on the nail for a few seconds, and gently wipe away the polish.
Your Fall Nails Look Fabulous!
Congratulations! You’re now equipped with the knowledge and inspiration to create stunning DIY fall nail art. Whether you choose warm ombre nails, intricate leaf designs, or cozy sweater patterns, your nails will reflect the season’s beauty.
Don’t hesitate to experiment, mix and match designs, and showcase your unique fall style. Remember to share your creations with friends and on social media, and tag us (#byjoycedoss) for a chance to be featured. Comment down below as well to share your creations and ideas.
Thank you for joining us on this fall nail art journey. Stay tuned for more beauty tips, trends, and inspiration. Happy fall, nail artists!
Live Your Life & Love It!
Recommended Blog: Revamp Your Fall Routine: 6 Scents for Ultimate Relaxation

